Logging to the ELK stack with Docker and Fluentd
This guide will show you how you can set up logging from ContainerSSH to your ELK stack when running in Docker. To facilitate the log transport we will be using Fluentd.
The source code of this guide is provided in our examples repository. We will be using docker-compose to deploy the elements of the setup inside our Docker engine.
In order to follow this guide you will need a local Docker setup similar to that in the quick start guide.
Step 1: Starting ContainerSSH
As with the quick start guide, we will be starting ContainerSSH using docker-compose. To do this we will first create our ContainerSSH configuration called config.yaml:
---
ssh:
  hostkeys:
    - /var/secrets/ssh_host_rsa_key
auth:
  url: "http://authconfig:8080"
configserver:
  url: "http://authconfig:8080/config"
dockerrun:
  host: unix:///var/run/docker.sock
log:
  level: debug
Next we will create a Dockerfile for ContainerSSH. We need to do this because ContainerSSH runs as non-root by default, but we won't have access to the Docker socket like this. Hence, our Dockerfile is rather simple:
FROM containerssh/containerssh:0.4.1
USER 0
Warning
Do not use this for production. See the Docker reference manual for details how to harden your setup.
Now we can create the SSH host keys. You can do this using OpenSSL by running openssl genrsa. For testing purposes you can use the dummy key from the example repo. The key should be saved as ssh_host_rsa_key.
The final piece of the puzzle is creating the docker-compose.yaml file:
---
version: '3.2'
services:
  containerssh:
    build: .
    ports:
      - 127.0.0.1:2222:2222
    volumes:
    - type: bind
      source: ./config.yaml
      target: /etc/containerssh/config.yaml
    - type: bind
      source: ./ssh_host_rsa_key
      target: /var/secrets/ssh_host_rsa_key
    - type: bind
      source: /var/run/docker.sock
      target: /var/run/docker.sock
  authconfig:
    image: containerssh/containerssh-test-authconfig:0.4.1
That's it, now we can start ContainerSSH using docker-compose up and log in using ssh foo@localhost -p 2222 with the password bar.
Step 2: Adding Fluentd
As a next step we will add Fluentd to our docker-compose.yaml and configure the ContainerSSH container to log to Fluentd.
First, let's create a file called fluentd/conf/fluent.conf. We add the listening config:
<source>
  @type forward
  port 24224
  bind 0.0.0.0
</source>
This will cause Fluentd to listen on port 24224. We will configure Docker to send the logs here later. Next we'll add a filter to unpack the JSON log messages ContainerSSH sends:
<filter containerssh.**>
  @type parser
  format json
  key_name log
  reserve_data true
</filter>
As a final piece we'll add forwarding to ElasticSearch:
<match containerssh.**>
  @type elasticsearch
  host elasticsearch
  port 9200
  logstash_format true
</match>
Note
The container named elasticsearch will be started later.
Now that we have the config ready we can create the Fluentd Dockerfile in the fluentd folder:
FROM fluent/fluentd:v1.12.0-debian-1.0
USER root
RUN ["gem", "install", "fluent-plugin-elasticsearch", "--no-document", "--version", "5.0.1"]
USER fluent
Everything is in place, let's add Fluentd to our docker-compose.yaml:
services:
  # ...
  fluentd:
    build: ./fluentd
    volumes:
      - ./fluentd/conf:/fluentd/etc
    ports:
      # We need to expose these ports to the host so the Docker engine can log to it.
      - "127.0.0.1:24224:24224"
      - "127.0.0.1:24224:24224/udp"
And finally, let's change the ContainerSSH part of the same file to send logs to Fluentd:
services:
  containerssh:
    #...
    logging:
      driver: fluentd
      options:
        # This address is from the perspective of the Docker daemon
        "fluentd-address": "127.0.0.1:24224"
        # This is the tag we match in the Fluentd config.
        "tag": "containerssh.{{.ID}}"
    depends_on:
      - fluentd
Now everything is done and we can start the modified setup by running docker-compose build and then docker-compose up.
Step 3: Starting the ELK stack
For our test setup we'll start a single-node Elasticsearch and Kibana by adding them to our docker-compose.yaml:
services:
  # ...
  elasticsearch:
    image: docker.elastic.co/elasticsearch/elasticsearch:7.10.2
    container_name: elasticsearch
    environment:
      # We are running ElasticSearch in single-node mode.
      # Do we need to say this is not production ready?
      - "discovery.type=single-node"
  kibana:
    image: kibana:7.10.1
    ports:
      - "127.0.0.1:5601:5601"
    depends_on:
      - elasticsearch
Now we're all done so we can start the stack with docker-compose up.
Step 4: Configuring Kibana
When you first start Kibana you will need to configure Kibana. To do that you need to head to http://localhost:5601/app/management/kibana/indexPatterns/create to create a new index pattern. Please enter the following:
logstash-*
At this point you may get an error that this index isn't present. This is usually because there are no logs in Elasticsearch yet. This can easily be fixed by manually stopping and restarting the ContainerSSH container to generate some logs:
docker stop <id of ContainerSSH container> && docker start <id of ContainerSSH container>
On the next step Kibana will ask you for the timestamp field. You can use both @timestamp and timestamp, they will contain the same values.
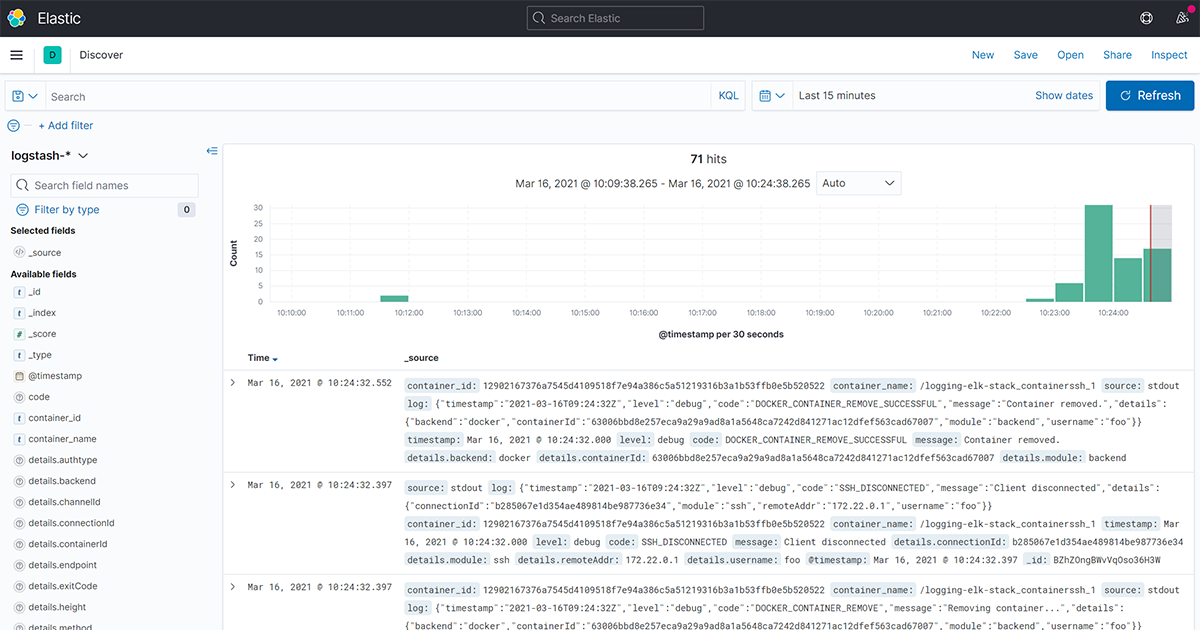
When the index is created you can head to http://localhost:5601/app/discover#/ and you should now see ContainerSSH logs in your Kibana. Congratulations!